Summiting Granite Peak- Montana's State High Point
- CJ Wolf
- Aug 12, 2025
- 6 min read
Fast Facts:
Base Elevation: 8,747
Peak Elevation: 12,807
Hiking Elevation Gain: 4,795
Distance: 26.3 miles
Elapsed Hiking Time: 15:51hours
Hiking Moving Time: 13:53hours
Date: August 9 - 11, 2025
Strava links:

It’s widely agreed that Granite Peak in Montana and Gannett Peak in Wyoming are the two most challenging and technical state high points in the lower 48. Our group summited Gannett last year, so on the hike out from Granite we debated which one was “harder.”
Several in the group picked Gannett for its sheer length—40 miles via the Tourist Route—and its relentless boulder hopping. Its couloir to the saddle has loose rock, but the exposure isn’t extreme, and once on the ridge there’s only one short technical section.
Granite, by contrast, is a shorter round trip at 26.3 miles, with a gentle approach to the headwall. But I voted Granite as the tougher climb due to the sustained technical terrain and significant exposure in its couloir.
Either way, Granite is a force to be reckoned with.
Day One
We spent the night in the tiny town of Silver Gate—population seven in the winter—before making the short 8-mile drive to the Lady of the Lake Trailhead on Saturday morning. We opted to drive the extra mile to the upper trailhead because…why not? Just remember: this is grizzly country, so don’t forget your bear spray.
After hiking just under 2 miles, you reach the south end of the Lady of the Lake but with no vertical gain despite going up and down a few hills.

At the 3 mile point, we weren't paying attention and continued straight at a fork in the trail when we should have gone left and crossed a small stream. At this point, we still had only gained 100 feet in attitude.

The next mile continues to undulate through the forest and meadows and at mile 4 there is another small creek crossing.

A mile 5, there was another creek crossing. Even though there are several small creek crossings, we never got our feet wet (hike poles definitely help).

At Mile ~6, you enter a lush valley with amazing wild flower. The elevation at mile 6 is only 9,369.
Around mile 7, you start to leave the more densely populated forest and enter more open terrain.

At around 7.5 miles, you surpass 10,000 in elevation and you get your first glimpse at the regions high peaks. But don't be fooled, the picture below is not Granite as Granite is hidden to the west (the left). I believe the picture below is Cairn Mountain (12,205). Right over this knoll is Lone Elk Lake and you start to enter the lake district. Pass Lone Elk Lake on the west (left) side.

At the 8-mile mark, you’ll reach Rough Lake and follow its right shoreline. We spotted a camper tucked along this side, but I’d recommend continuing on. After Rough Lake, you’ll cross Sky Top Creek and begin a short westward climb of about 300 vertical feet. From here on, there’s no defined trail—just pick the path of least resistance up the hill, aiming toward the other Sky Top Lakes.

From the top of this small knoll, you’ll spot a larger lake at about 10,450 feet and 9.4 miles in. We had planned to camp here, but space was tight for three tents, and one member of our group needed softer soil for his tent poles. Instead, we continued along the south (left) side of the next two lakes, gaining another 1.2 miles, until we found a grassy patch above Sky Top Creek on the left. Our campsite ended up being 9.6 miles in, just below 10,500 feet.
In hindsight, pressing on was the right call—it gave us incredible views of Granite and made for a shorter summit day. From camp, it was only 2 miles to the summit with about 2,300 feet of vertical gain.
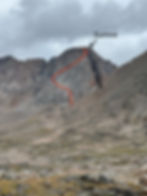
Our campsite on the hill offered spectacular views of Granite—and I’m not going to lie, I was more than a little intimidated by the work ahead. The headwall loomed large and imposing. My nephew explained that our route up the southwest couloir wasn’t actually visible from our vantage point, as it was tucked behind a ridge (more on the approach below).
While I was filling my water from the stream, a mountain goat rounded the corner and startled me. He quickly became our unofficial campsite mascot, hanging around until we turned in for the night. This male goat was anything but aggressive and he seemed more wary of us than we were of him.


We got super lucky with weather as there was no wind, clear skies and a full moon. The picture below was taken at 2 am.

Day 2: Summit Day
My alarm went off at 5:30 and I hit the trail at 6 AM solo as I wanted to get a head start on my faster buddies.
As I mentioned above, the southwest ramp wasn't visible from our vantage point at camp but I drew a rough route where the ramp would be. From camp, the goal was to aim for the snow tongue at the bottom.

Along the way to the headwall, you crossover a short snow field but because it was low angle, no crampons were needed.

The hike to the base of the headwall was about 1.6 miles and it took me under an hour. I caught up with another solo hiker and we started walking towards the snow tongue together. When we reached the snow tongue, we went to the left side of it as it offered more route options - look for cairns.

After you climb above the snow tongue, aim for the light & then dark rock slab.

Continue walking below the slab until they become dark and you soon you will encounter the southwest ramp.
Once you get eyes on the ramp, the path to the top becomes more obvious.
The bottom part is easy going and the rocks are fairly stable.

After about 200 vert of climbing, you encounter your first of 3 fixed rope sections. The first one had two ropes fixed which offers a nice backup as these ropers are old and even frayed. It is a little disconcerting to put all of your faith in these ropes so be cautious and use them sparingly. The first rope section is the longest but only about 20 vert feet. See picture below.
The 2nd rope section was a little shorter and I only used the rope for the first move.

The 3rd and final rope section can be avoided by climbing further to the right and I would recommend going around the rope section both up & down.
After the 3rd rope section, you are now close to The Gash that is illistrated in the picture of the headwall above. When you get to the edge/ridge, you are out of the coulior and you will now start working your way to your left (away from The Gash-phew). You should see some cairns but you want to wrap around to a less exposed area with solid hand/footholds. You are now almost at the summit ridge which appears to be a false summit.

After reaching the summit ridge, you have a short but exposed hike to the actual summit. The rocks are firm so just don't look down. LOL.
The summit is always rewarding.
I was concerned about descending through the fixed rope sections so I didn't spend much time on the summit. As I stated above, try to avoid the top rope section by going further hiker's left on the way down and you will drop back into the couloir below it.
Here is a photo of the top rope section.

Photo of descending the middle or 2nd rope section.

Exiting the snow field.


